Saturday, July 6, 2013

Weekly Roundup: Americana Edition

How did you celebrate your Independence Day? We had great fun sharing recipes and crafts here at +Make Your Own this week in honor of the 4th of July! Some of our most popular posts from this week are below!

Patriotic Food

Red, White, and Blue Fruit Skewers

Patriotic Taco Salad

Firecracker Cookies

4th of July Trifle Recipe

Red, White, and Blue Sangria


Patriotic Crafts

DIY Red, White, and Blue Sidewalk Chalk

4th of July Mason Jar Luminaries

DIY Firework Painting

4th of July Table Décor

DIY Paper Fireworks

We hope you're enjoying your summer as much as we are! We're getting closer to that exciting news - it's coming up soon! So stay tuned!

Next week is all about Olive Oil! Come and learn why olive oil is healthy and how you can cook with it, infuse it, and use it in your beauty routines!

Have a fantastic weekend! See you back here next week!
Happy 4th of July!


Sunday, June 30, 2013

Weekly Roundup: Kid Edition

The kids are out of school, and boy did we have a fantastic time rounding up activities and projects to keep them busy this summer! Below are some of our most popular posts from Facebook!

We have a variety of kits to keep kids busy here at +Make Your Own! Check out our selection here!

Our most popular kid's kit is the Make Your Own Bubble Gum kit. It's fun and easy to do, providing entertainment for the whole family!


~Keeping Kids Sharp over the Summer


~Activities and Crafts


We also have a Pinterest board that's all about kids! Check it out here and find lots of ideas to keep the kids entertained during the dog days of summer!
 
We hope you enjoyed Kids Week as much as we did here at Make Your Own! Don't forget to follow us on Facebook so you don't miss anything that we post!
 
There is some exciting news coming from Make Your Own soon so stay tuned for that! In the meantime, this week is Americana Week here at Make Your Own! In honor of the Independence Day holiday, we're celebrating with everything Red, White, and Blue!
 
Enjoy your week!


Wednesday, June 26, 2013

It's time for a Scavenger Hunt!

Here at +Make Your Own all this week, we're focusing on kids and keeping them busy and their minds sharp this summer! If you're following us on Facebook then you know what we've shared so far!

Today, I wanted to share with you, a fun summertime activity that you can share with your kids, their friends, neighbors, or family!

Gather the kids around and send them on a Scavenger Hunt. We've taken the guess work out for you and have created a Scavenger Hunt form for you to print and give out to the kids before you send them on their way!

Click the icon to download the form!

 
(If you can't get the file to download, email us and we'll send you a copy!)

This is a great activity to get them out into the neighborhood and exploring their surroundings!

We hope you are enjoying the start of summer and don't forget to follow us on Facebook so you don't miss anything we're sharing!


Sunday, June 23, 2013

Weekly Roundup: Yogurt Edition

Yogurt week was so much fun here at +Make Your Own! We found tons of uses for yogurt other than cooking AND we shared tons of recipes! Find some of our most popular posts below!

We have a complete Make Your Own Yogurt kit right here at Make Your Own! Check it out and get started making your own homemade yogurt today! Comes with everything you need aside from the milk!


We also carry yogurt making accessories right here at Make Your Own!

Yogurt Making Techniques & Benefits

Making Homemade Yogurt

Making Greek Yogurt

The Benefits of Homemade Yogurt

Alternative Uses for Yogurt

5 Ways to Keep Skin Glowing with Yogurt

DIY Yogurt Moisturizer

DIY Facials - Yogurt Masks

What do you do with all that Whey?

18 Ways to Use Whey

Skin Care Benefits of Whey

Cooking with Yogurt

Frozen Yogurt Berries

Tzatziki Recipe

Feta & Herb Dip

We hope you enjoyed Yogurt week as much as we did here! Stay tuned next week for All About Kids! The school year has come to a close and now the summer months are looming ahead! Don't worry, we've got you covered with activities and ideas to keep kids busy and their minds sharp this summer! Make sure to follow us on Facebook so you don't miss a single post!

Have a great week!


Saturday, June 15, 2013

Weekly Roundup: Dad Edition

Usually we do our weekly roundup on Sundays, but this week we wanted to bring you our roundup a little early just in case you're looking for last minute Father's Day gift ideas.

We had so much fun here at +Make Your Own this week finding fun crafts and DIY projects for Dad! We're also running a great special that you can still take advantage of!


Stop in and spend $25 or more on Beer Supplies, Jerky Supplies, or Sausage Supplies and get a FREE $10 gift card to Make Your Own!


See Store Associate for details ~ Offer expires 6/15/13 ~ One offer per customer
Not valid on sale prices ~ Offer valid only at our retail location
 
All About Dad!


Crafts & DIY Projects for Dad's Day
 
 
We hope all you Dads out there have a fabulous Father's Day! 


Stay tuned next week on Facebook for DIY Yogurt week! Learn all about the benefits of making your own yogurt as well as recipes and techniques for making your own!


Sunday, June 9, 2013

Weekly Roundup: Soap Edition

Soap week has come to an end here at +Make Your Own! We had a great week learning all about the different ways to make soap and finding different soap recipes as well as some soap crafts! If you missed any of our posts on Facebook then read more below as we highlight some of our most popular posts this week!

Soap Making Supplies at Make Your Own
 
The Soap Making Kit comes with everything you need to get started
making melt-and-pour soap!
 
We have a variety of soap making supplies for all of your soap making needs!


Learning to Make Soap


Soap Crafts & Recipes


Did you know there are also many benefits to making and using your own soap? If you have allergies or sensitive skin, making your own soap may be a great option for you!
 
We posted several DIY soap crafts on Pinterest this week as well! Check them out!
 
***
 
Next week is all about Dad here at Make Your Own and
 we have a dynamite offer that you won't want to miss!
 
 
Stop in and purchase $25 in beer supplies or kits, jerky supplies or kits, sausage supplies or kits and get a FREE $10 gift card to Make Your Own!
 
See a store associate for details. Offer expires on 6/15/13.
One offer per customer ~ Only available at our retail location
Not valid or combinable with other offers
 

Enjoy your week! We'll see you here again next week
for our Weekly Roundup: Dad Edition!
Don't forget to follow us on Facebook so you don't miss any of the fun stuff we share!


Sunday, June 2, 2013

Weekly Roundup: Wine Edition

Wine week has come to an end here at +Make Your Own! We had great fun and learned a few things along the way!

So let's round up this week's most popular wine posts from Facebook.

First, check out our blog entry on brewing Rosé Blend wine right here in the store! Learn about how making wine can be easy and fun!

Are you new to wine making? We have all the equipment you need to get started!


We also have wine concentrate kits as well as Walker's Wine Juice here at the store to get you started! A variety of wine making books grace our shelves as well!
 
 
Learn How to Make Wine


Wine Making Recipes & Techniques


Cooking with Wine


We hope you enjoyed wine week with us! Do you have any recipes for making wine or for cooking with wine? Share them with us - we love trying new things!
 
Each week we send out a newsletter that is chock full of goodies! Have you signed up yet? If not, head over here to sign up! By signing up, you'll get to enjoy special discounts, recipes, and fun offers that we only offer to our newsletter subscribers!
 
Don't forget to follow us on Facebook, Twitter, and Pinterest so you don't miss anything! Have a great weekend and we'll see you next week!


Thursday, May 30, 2013

Rose Blend Wine: Brewing it Our Way

Walkers Rose Blend Red Wine

About Walkers Juice
Walkers hot-pressed red grapes, assures each wine maker that they are getting highest quality wine. Walkers standardizes most of their juice at 21 percent sugar, unless the juice has a naturally higher content.  If you want to know the acid content or pH level they are listed on each container.


We started a Walkers Rose Blend Red Wine in the store! 

Did you know you can start this juice right in the food grade carboy it comes in? Walkers juice comes with everything you need to get the started, all you add is the yeast nutrient and the yeast. Some people just sprinkle the yeast on the juice but we re-hydrated our yeast to give it a jump start. (Walkers recommends this too!) We activated the yeast by adding slightly warmed water to the dry yeast and gave it a few minutes to start. While waiting for the yeast to re-hydrate we sprinkled the yeast nutrient into our juice.  We added this to replenish any of the nutrients that maybe naturally deficient in our juice.  It is not necessary to feed our yeast but we want to give it the best 'working' condition possible! 


As you can see our initial stage was quite violent.  Just look closely at the picture, you can see the gas escaping through the liquid. This can continue for 7 to 14 days but as time goes on, the explosions will be come less frequent and less aggressive. We will be keeping an eye on the bubbler and adding more water if the level drops.  This can be due to the aggressive stage or from simple evaporation.  

Now we just sit back, watch and wait for the next step.  This will be about 3 to 6 months when we will rack, stabilize and finally bottle our wine.  

Would you prefer to use a glass carboy? Many people do.  We carry them in several sizes, plus all the other things you may need like the rubber bung and bubbler.  Yes, it really is that easy to make wine!  Stop in and let us show you how!


Sunday, May 26, 2013

Weekly Roundup: Beer Edition

It's been a fun BEER week here at +Make Your Own! We've learned a lot and shared a lot about brewing, cooking with beer and even the surprising health benefits of beer! Let's round up some of our most popular posts from Facebook this week!

Get started brewing beer with supplies and kits from Make Your Own!


(We also blogged about a recipe using your Mr. Beer Home Brew Kit. You can see that recipe here. It's easy to get more out of your Mr. Beer Home Brew kit!)
 
Just getting started with a home brew hobby? These links walk you through the process of brewing!


Cooking with beer can be fun! Try out some new, delicious recipes today!


Finally, some miscellaneous beer posts!


We hope you have enjoyed Beer Week here at Make Your Own as much as we have! We've learned so much about beer that we never knew! What did you learn? Make sure to follow us on Facebook to keep updated on all of our posts!
 
Next week....WINE WEEK!!! Stay tuned!
 
Have a safe and happy Memorial Day! 

Wednesday, May 22, 2013

Getting more out of your Mr. Beer Home Brew Kit

This week is beer week here at +Make Your Own! If you haven't checked out our Facebook page yet, hop on over and see what we've been posting! We're sharing recipes, brewing techniques and even brewing videos this week!

Right now, let's focus on getting more out of your Mr. Beer home brew kit. The Mr. Beer website has tons of great recipes that you can try out. If you haven't read our recent blog posts about the Mr. Beer home brew kit you can check them out using the following links: Part 1 Part 2 Part 3 and Part 4. Each part takes you through the brewing process step-by-step! 

Recently, we made a Raspberry Wheat that turned out amazing and is perfect for warm evenings or an afternoon BBQ! 


This recipe is available on the Mr. Beer website, but we made a couple slight changes from their original recipe. How you brew yours is up to you!

Ingredients:
1 Bavarian Weissbier Refill (You can find that here)
1 Packet Dry Wheat Brewing Yeast (included in refill pack)
13oz Corn Sugar (You can find corn sugar here)
1 Can Red Raspberries in Heavy Syrup
Cleanser (You can find that here)

You Will Need: 
Blender
3 quart stock pot
4 cup glass measuring cup

Instructions:

First, follow instructions for cleaning and sanitizing all of your equipment and any instruments that will be coming into contact with your beer. Cleaning and sanitizing instructions came with your Mr. Beer Home Brew Kit or you can view Part 1 of our Brewing with Mr. Beer series. 

Puree raspberries in a sanitized blender and set aside. Remove the yeast from under the lid of the Weissbier can and set the can into a bowl with hot tap water. (This helps the syrup in the can melt slightly so it's easier to pour.)

Using your sanitized measuring cup, pour 4 cups of water into your clean stock pot. Slowly, add the corn sugar, stirring to prevent clumps within the water. Bring the water to a boil, stirring frequently. Once a rapid boil occurs, remove from heat and add the can of Weissbier, stirring thoroughly to mix. 

Add 4 quarts of cold tap water to your keg. (Look for the 4 quart mark on the back of the keg.) Pour your mixture (wort) from the pot into the keg and top the keg off with cold water up to the 8.5 quart mark. Add the pureed raspberries and stir thoroughly to combine. Sprinkle the yeast packet in the keg and screw on the lid. 

Store your keg out of direct sunlight and in an area that has a consistent temperature between 68 and 74 degrees. The raspberries in this mixture can cause quite violent fermentation. Make sure to keep the keg out of direct sunlight AND make sure the room temperature is consistent. Place the keg on a rimmed cookie sheet and check it daily for leaking. If it does leak, remove the lid and wipe clean with a paper towel dipped in sanitized solution then replace lid. 

Fermentation should take about 7-14 days. Follow the directions that came with your Mr. Beer Home Brew Kit for bottling or view Part 4 in our blog series. 

The Mr. Beer website describes the Raspberry Wheat in this way:

This framboise style brew combines the tart qualities of both raspberries and wheat to produce a deep red, cloudy, crisp and fruity beer that will make anyone a believer in home brew. A refreshing summer drink that fits well as an after dinner pairing with light tart tasting desserts.  

Have you made any special brews with your Mr. Beer Home Brew kit? If so, let us know! We love to try new recipes out! 

Happy Beer Week!


Sunday, May 19, 2013

Weekly Roundup: BBQ Edition

Another great week here in Western NY! Where else can you go that it snows on Monday and it's 80 degrees on Wednesday?


Obviously, I'm exaggerating slightly - we didn't get a ton of snow on Monday, but in May flurries or 6" seem one in the same!


Have you been following us on Facebook? If not, clickie that linkie and 'like' us so you don't miss all the fun! We're trying something new around here - each week we're going to focus on a new theme and then we're going to do a weekly roundup of posts for you on the blog!

This past week was BBQ week - in celebration of BBQ month! We posted some recipes, links to cool BBQ tools that we sell here at Make Your Own, and some tips and tricks for grilling!

BBQ Tools that are available at Make Your Own:

Stainless Steel BBQ Skewers


We also have several marinades to choose from along with a wide variety of seasonings and spices.
 
Some of the recipes we featured:


You can find more recipes on our Pinterest May is BBQ Month board!
 
We started this BBQ week with some Fun Facts about BBQ! Check it out!
 
What have you BBQ'd lately? Do you have a fun, unique recipe? Share it with us!
 
Be sure to follow us on Facebook because next week is Beer week! What ties in better with BBQ? We'll be posting information on making your own beer, recipes for craft beers and also, cooking with beer! Don't miss out!


Tuesday, May 7, 2013

Mr. Beer's Bavarian Wessbier Refill Kit

Our second batch of home-brewed beer!

This past weekend we did our first taste test of our second batch of beer.  We used Mr. Beer's Bavarian Weissbier refill kit and this was simply delicious!  We really recommend this one!  Stop in and we will get you started with Mr. Beer.

Check back for our next blog!  We have a special surprise for you!

Monday, May 6, 2013

All about Mom!


Mother's Day is Sunday May 12th! Mother's Day is all about Mom, but do you know the origins of Mother's Day? Read on to get a little history lesson about Mother's Day and a special offer from Make Your Own! Don't forget to follow us on Facebook, Twitter, and Pinterest! We'll be posting stuff about Mother's Day all week! Crafts, trivia, printables, etc!
The History of Mother's Day


The first North American Mother’s Day was conceptualized with Julia Ward Howe’s Mother’s Day Proclamation in 1870.


Despite having penned The Battle Hymn of the Republic twelve years earlier, Howe had become so distraught by the death and carnage of the Civil War that she called on Mother’s to come together and protest what she saw as the futility of their Sons killing the Sons of other Mothers.


At one point Howe even proposed converting July 4th into Mother’s Day, in order to dedicate the nation’s anniversary to peace. Eventually, however, June 2nd was designated for the celebration.


In 1873 women’s groups in 18 North American cities observed this new Mother’s holiday. Howe initially funded many of these celebrations, but most of them died out once she stopped footing the bill. The city of Boston, however, would continue celebrating Howe’s holiday for 10 more years.


Despite the decided failure of her holiday, Howe had nevertheless planted the seed that would blossom into what we know as Mother’s Day today. A West Virginia women’s group led by Anna Reeves Jarvis began to celebrate an adaptation of Howe’s holiday. In order to re-unite families and neighbors that had been divided between the Union and Confederate sides of the Civil War, the group held a Mother’s Friendship Day.


After Anna Reeves Jarvis died, her daughter Anna M. Jarvis campaigned for the creation of an official Mother’s Day in remembrance of her mother and in honor of peace.


In 1908, Anna petitioned the superintendent of the church where her Mother had spent over 20 years teaching Sunday School. Her request was honored, and on May 10, 1908, the first official Mother's Day celebration took place at Andrew's Methodist Church in Grafton, West Virginia and a church in Philadelphia, Pennsylvania. The West Virginia event drew a congregation of 407 and Anna Jarvis arranged for white carnations — her Mother’s favorite flower — to adorn the patrons. Two carnations were given to every Mother in attendance.


Today, white carnations are used to honor deceased Mothers, while pink or red carnations pay tribute to Mothers who are still alive.


In 1908 a U.S. Senator from Nebraska, Elmer Burkett, proposed making Mother's Day a national holiday at the request of the Young Men's Christian Association (YMCA). The proposal was defeated, but by 1909 forty-six states were holding Mother's Day services as well as parts of Canada and Mexico.


Anna Jarvis quit working and devoted herself full time to the creation of Mother's Day, endlessly petitioning state governments, business leaders, women groups, churches and other institutions and organizations. She finally convinced the World's Sunday School Association to back her, a key influence over state legislators and congress. In 1912 West Virginia became the first state to officially recognize Mother's Day, and in 1914 Woodrow Wilson signed it into national observance, declaring the second Sunday in May as Mother's Day.


The holiday flourished in the United States. Flowers, especially white carnations, became a very popular part of the celebration. One business journal, Florists Review, went so far as to print, “This was a holiday that could be exploited.” But the budding commercialization of Mother's Day greatly disturbed Jarvis, who vociferously opposed what she perceived as a misuse of the holiday.


In 1923 Jarvis sued to stop a Mother’s Day event. In the 1930's she was arrested for disturbing the peace at the American War Mothers group: She was protesting their sale of flowers. Jarvis also petitioned against a postage stamp featuring her Mother with a vase of white carnations and the word “Mother’s Day.” Jarvis was able to have the words “Mother’s Day” removed ... but the flowers remained.


In 1938, Time Magazine ran an article about Jarvis's fight to copyright Mother's Day, but by then it was already too late to change the commercial trend.


In opposition to the flower industry’s exploitation of the holiday, Jarvis wrote, “What will you do to route charlatans, bandits, pirates, racketeers, kidnappers and other termites that would undermine with their greed one of the finest, noblest and truest movements and celebrations?” Despite her efforts, flower sales on Mother's Day continued to grow. Florist's Review wrote, “Miss Jarvis was completely squelched.”


Anna Jarvis died in 1948, blind, poor and childless. Jarvis would never know that it was, ironically, The Florist's Exchange that had anonymously paid for her care.


More Mother's Day history can be found here


Mother's Day Special at Make Your Own


When you stop into Make Your Own before 5/11/13 and purchase any Make Your Own branded kit you will get a FREE $5 gift card to Make Your Own! Keep the gift card for yourself or add it to Mom's gift so she can purchase more supplies!

 Make Your Own branded kits include:
 Make Your Own Root Beer
Make Your Own Soda Pop
Make Your Own Hot Sauce
Make Your Own Mustard
Make Your Own Vinegar
Make Your Own Yogurt
Make Your Own Bubble Gum
Make Your Own Spa Bath
Make Your Own Soap
Make Your Own Lip Balm

 Supplies are limited so hurry in! No coupon necessary!

Offer valid only at Make Your Own retail location in Lockport, NY. Sorry, not available on our website. One offer per customer. Not valid on sale prices. Expires 5/11/13

To all the Mom's out there - we hope you have a spectacular Mother's Day!


Tuesday, April 16, 2013

Brewing with Mr. Beer - Observations

Mr. Beer Premium Brew Kit

We have been conditioning our Classic American Light beer for a few weeks now but I want to take a step back to when we first bottled our beer.  We originally started to condition it in the refrigerator.  This is an accepted method that we found but there is a debate on the best way to start.  The second method is keep it in a dark room that has a cool temperature until your bottles become firm, then move them to the refrigerator.  (A firm plastic bottle indicates that your beer has carbonated.)  In the refrigerator our beer simply was conditioning very slowly.  We took the bottles out and kept them in the basement until they became firm.  They are back in the refrigerator and we have been taste testing one bottle each week.  It is up to you how you would like to condition your  beer.  I can tell you that we started a new batch of beer and started to condition it at room temperature!

If you like a very light beer, the Classic American Light beer is for you.  Our next batch is the Bavarian Weissbier.  We'll let you know how this one is!

Thursday, March 21, 2013

Brewing Beer with Mr. Beer - Part 4

Bottling our home made beer

We have been blogging about the Mr. Beer Premium Brew Kit, the steps we did in preparation to brewing our beer and watching it brew over the past 2 weeks.  Check out our previous posts here and here. This past weekend we bottled our Classic American Light.

Mr. Beer


We checked our brew and gave it 2 additional days because it was still a bit cloudy.  When we checked it again there was still a few 'yeast parties' going on but the brew was clear so we went ahead with bottling it.  We took our sanitizer and sterilized both our beer bottles and the caps.  All of this was included in our Mr. Beer kit. 
Once your bottles are sanitized, just pour the cleaner and water out of your bottles.  There is no need to rinse the bottles again.  Don't forget to clean your caps too.  We took a bowl, filled it with the cleaning solution and dropped the caps in! 

Once our bottles were clean we added the recommended amount of sugar to each bottle.  Right now we have flat tasting beer.  Adding sugar will complete the process and carbonate our beverage.

Adding Sugar


Filling the bottles was easy, we just needed to remember to tip the bottle so we didn't have a lot of bubbles in the bottle. 


After all of our bottles were filled, we carefully put the screw caps on the bottles.  If you just keep turning, they will lock in place.  Once everything is nice and secure, we gently turned the bottles over to mix the sugar in.  Don't shake them.


We are conditioning our beer in the refrigerator and it should be ready for a taste test in about a week.  Mr. Beer recommends letting it condition for a longer period of time to improve the flavor of the beer.  Our plan is to taste test one a week and see when we like it the best.  We'll let you know what the results are!  In the meantime, we started a new flavor brewing!

Bottled American Light

Thursday, March 14, 2013

Brewing Beer with Mr. Beer - Part 3

Brewing beer at home using the Mr. Beer Premium Brew Kit 
The final week in our brewing keg!

We wanted to check our yeast party in Mr. Beer's brewing keg and let you know how everything is going.  Remember we can't open the keg to check our beer until it has completely finished brewing, so we took our handy little flashlight and peaked through the keg wall.  There are still some yeast floating at the top but not as much as there had been. This means the brewing process is slowing down and coming to an end soon.  We can also see sediment in the bottom of the keg now.  This week-end our Classic American Light Beer should be finished and ready to bottle but that will be our next blog!  If your looking for the first blog in this series, you can find it here.

See you soon and keep brewing!

Tuesday, March 5, 2013

Brewing Beer with Mr. Beer - Part 2


Welcome back to brewing with Mr. Beer!
Part 2 Brewing your beer

Last week we blogged about the Mr. Beer Premium Brewing kit and the steps we took in preparation for brewing our beer.  You should have cleaned and sanitized everything you are working with. 
Cleaning everything


If you missed that blog you can read about it here.

We took our can of American Light Beer malt, removed the top and took out the yeast packet before placing it in a pot of warm water.  This makes working with the malt easier.  While it was warming, we boiled the specified amount of water in a pot.  Once the water boiled we removed it from the heat.
Warming the malt


Open the bottom of your can of malt.  Yes, the bottom!  We opened the wrong end and it does make a difference.  Do you want very sticky malt all over your kitchen?  We didn't either!
Opening the wrong
 end of the can


Pour the malt slowly in the hot water, mixing as you pour.  Make sure you completely stir the malt and water.  Here is where we used the spatula to scrap all of the malt out of the can.
Stir in the malt


Using cold water we poured the indicated amount into our keg and then added the malt water mixture to it.  This was topped off with more cold water. We didn't add the water slow enough and ended up with it bubbling over the top so be sure you add the water very slowly.  Also you don't want to use distilled water.  The mixture needs the minerals that are in the water.  For that reason, we didn't use filtered water either.  We used refrigerated tap water.
Malt mixture

Foaming up


Once everything was in the keg, we sprinkled the yeast on top of the mixture and put the lid on the keg.  Don't mix the yeast in, just let it sit there.  Our keg was moved to a room that is about 68 degrees and covered it with a cloth for darkness.
Ready to brew


The DVD said we could check for a yeast party after a few days to see if the beer is brewing.  We did and the yeast are partying!  The mixture is hazy but will clear up when the yeast have done their job.  We can't open the keg but can peek inside and check with our flashlight.  

We will blog when our beer finishes brewing in the keg, how we carbonate it and bottle it.  That should be around March 19th.  See you then!

Thursday, February 28, 2013

Brewing Beer with Mr. Beer - Part 1


Brewing Beer at Home with Mr. Beer
Part 1 Getting Ready

Have you ever wondered about making beer at home?  We did!  The Mr. Beer Home Brewing kit comes with everything you need to brew delicious beer right in the comfort of your own home.  What better way to impress your friends during at a party or the next game!

We will be blogging about our experience over the next 2 or 3 weeks so be sure to stop back and see where we are in our process.  Are you wondering if this is going to be very complicated?  I'm happy to say it's not!

I'm using the Mr. Beer Premium Edition kit, that we sell right here at Make Your Own at Home.  The kit contains everything you need to brew your first batch of beer.  There are a few extra things you will need, such as water!  Don't throw your kit away after your beer is brewed because we have refill kits!  You can purchase your favorite flavor including; Classic American Light, Canadian Blonde, Bavarian Wissbier, Oktoberfest Lager, St. Patrick's Irish Stout, and Northwest Pale Ale, just to name a few!

My kit contained:

2 gallon fermentation keg
lid and spigot assembly for the keg
yeast
cleaner
hopped malt (I'm brewing Classic American Light)
8 reusable bottles with caps (We sell replacement caps and bottles in the store)
DVD on how to use the kit to brew beer

Additional items I used:

a metal spoon
cold water
measuring spoons and cup
a plate
3 quart pot
sugar
spatula

I thought this was going to be complex until I watched the DVD, it's not!! 

The keg goes together very simply.  Fit the shaped gasket with the bevel outwards, slip the spigot into the keg and screw the nut from the inside of the keg.  Test your keg with tap water to make sure it is not leaking.

One of the most important steps when home brewing is sanitation.  Everything you use must be cleaned properly!  After washing your hands and dumping out the tap water from your keg, fill it to the level indicated and add the recommended amount of sanitizer, (the included cleanser).  Swirl the mixture around in the keg, put the lid on top and swirl the mix again.  You want to get every area in your keg clean and sanitized.  Take all the items you will be using, place them inside the keg and swirl again so they are also cleaned.  Open your spigot and let the mix rinse over the plate you will use.  Remove the items from your keg and place them on your clean plate.  Now you can turn your keg over and dump out the remaining sanitizer.

That's it!  We're ready to start home brewing our beer.  Check back next Tuesday evening for part 2 - brewing our Classic American Light beer!

Thursday, February 14, 2013

Making Sweet and Spicy Beer Mustard


This week at Make Your Own at Home we made Sweet & Spicy Beer Mustard! If you like very spicy condiments then this is for you.  If you like it a bit less spicy, then check my tip at the end of the blog.

Make Your Own Gourmet Mustard Kit
 
This recipe is one of several that are included in our "Make Your Own Mustard Kit" that was featured on Studio 5!  If you missed that morning show presentation you can see it here

What I used to make sweet & spicy beer mustard:

Mustard powder
Mustard seeds
Cider vinegar
Honey
Any kind of beer
Water
Brown sugar
Cinnamon
Clove
Garlic powder

Everything you need to make mustard is included in the kit.  The only thing you add is the beer.  The mustard seeds are not ground up so you can make your mustard have more or less texture based on your personal preferences.  I like food with texture so I did not grind my seeds up to a fine powder.  You can see what I did  here:

Fresh Mustard Seeds


Course Ground Seeds


I combined the water, mustard seeds and mustard powder in a bowl.


Mix completely


After mixing it, let it set for 10 minutes.

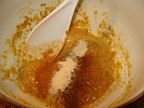
Add the honey, vinegar, brown sugar and mix.


Add the garlic powder, beer, cinnamon and clove.   Tip: here is where you should make an adjustment if you prefer a milder flavor.  Try only putting 1/2 the suggested amount of clove and cinnamon.  Mix it well and taste test it.  If you want more spice, add it. 


This is my finished Sweet & Spicy Beer Mustard. It will be thin but it did get a bit thicker in the refrigerator.  It is very spicy and it really was that simple to make!  If you like a sweet mustard, you will find recipes and ingredients for our Honey Mustard or Apple Cider-Maple Mustard in the Make Your Own Mustard Kit.  This kit has a recipe for all types of mustard lovers.  Give it try!  I'll bet you love it and you can say you made it yourself!


What's next on the Make Your Own at Home blog?  It could be how to make beer with our Mr. Beer Kit or how to make beef jerky with one of our many spice kits.  Stay tuned!

Make sure you follow us on Facebook and Twitter to stay up to date on all things Make Your Own!